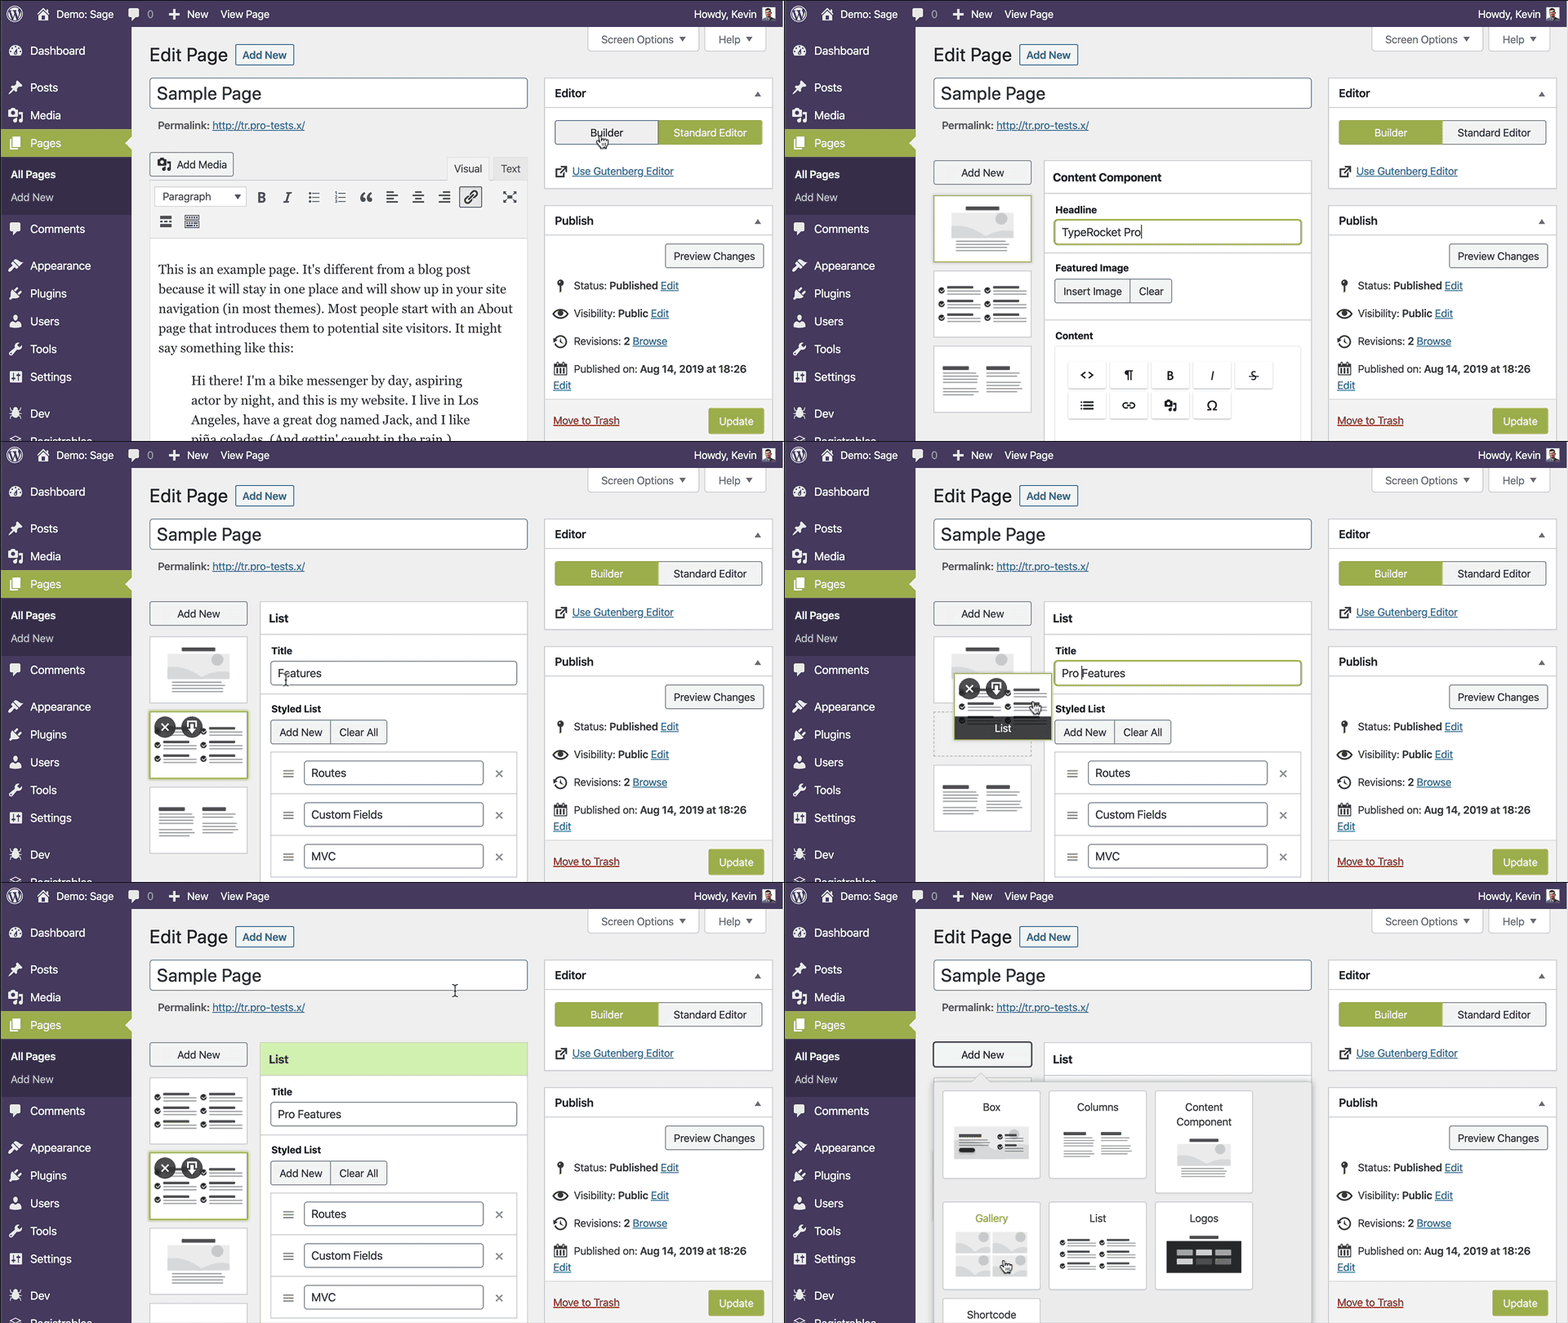
TypeRocket v1 Pro users can now upgrade to TypeRocket v5 at their convenience.
Page Builder for WordPress
( v1 )
- # Enable Page Builder
- # About Page Builder
- # Basic Usage
- # Component Folders
- # Content Component
- # Backend Fields
- # Thumbnail
- # Visual
- # Adding Components
- # Dynamic Thumbnails
Enable Page Builder
By default, the Page Builder will be the default editor for WordPress pages. To replace it with Gutenberg, add the following to your wp-config.php file.
define('TR_PAGE_BUILDER', false);
About Page Builder
The page builder plugin helps developers and designers work together with clients to deliver the best experience when building modular/component-based designs.
Basic Usage
For the most basic setup, duplicate your theme's current page.php template and rename it to standard.php. Now, in the page.php template file, use the page builder.
<?php get_header();

if( tr_post_field("use_builder") == '1') {
    tr_components_field('builder');
} else {
    get_template_part('standard');
}

get_footer();
This code will use the old page template standard.php if the builder is not being used.
Component Folders
There are three directories you need. The directories are: resources/visuals/builder, resources/components/builder, and wordpress/assets/components/builder.
- The
resources/visuals/builderdirectory is for adding the HTML for each component's front-end design. - The
resources/components/builderdirectory is for adding the backend fields for each component. - Finally, the
wordpress/assets/components/builderdirectory is for the thumbnails of the components.
Note: If you are using the official WordPress plugin you need to create these folders in your active theme.
Content Component
To get started, examine the content component. This will give you a deeper look at what is going on and just how easy builder modular designs can be.
Backend Fields
First, look at the components backend resources/visuals/builder/content.php. Here you can see two fields. One for a headline and one for some content. Also, the <h1> tag gives the component its name in the WordPress admin.
<h1>Content Component</h1>
<?php
echo $form->text('Headline');
echo $form->editor('Content');
Note: the $form variable is added for you and is an instance of the TypeRocketElementsForm class.
Thumbnail
To make the builder admin slide resemble the look of the component you, a thumbnail has been added at wordpress/assets/components/builder/content.png. Thumbnails can be anything you like. In many cases, a screenshot of the design it implements is the way to go.
Visual
Take a look at the content components visual. Here you can see that the fields from the backend are accessible through the $data variable. This is true for all visuals.
<div class="builder-content">
    <h2><?php echo esc_html($data['headline']); ?></h2>
    <hr />
    <?php echo tr_sanitize_editor($data['content']); ?>
</div>
Adding Components
To add new components, follow the pattern of the included content component. It is that easy. Create a visual, fields component, and thumbnail in the builder folder of each location.
You can use the Galaxy CLI command make:component to create your component files quickly.
php galaxy make:component builder "My Component Name"
This command will create two files in builder folders.
-
components/builder/my-component-name.php -
visuals/builder/my-component-name.php
Dynamic Thumbnails
You can dynamically set thumbnails using the tr_builder_component_thumbnails hook. This is helpful if a field setting within your component changes the visual representation of the component.
$path = tr_cinfig('urls.components');
add_filter('tr_builder_component_thumbnails', function($thumbnail, $v, $type, $name) use($path) {

    if($v && $type == 'grid') {
        $cells = $v['cells_per_row'] ?: 4;
        $style = $v['style'] ?: 'default';
        $thumbnail = "$path/$name/$type-$cells-$style.png";
    }

    if($v && $type == 'feature') {
        $align = $v['align'] ?: 'right';
        $thumbnail = "$path/$name/$type-$align.png";
    }

    if($v && $type == 'benefits') {
        $align = $v['align'] ?: 'right';
        $style = $v['style'] ?: 'default';
        $thumbnail = "$path/$name/$type-$align-$style.png";
    }

    return $thumbnail;
}, 10, 5);
Found a typo? Something is wrong in this documentation? Fork and edit it!
