Access all of Typerocket. Get Pro.
Page Builder for WordPress
( v6 )
- # About Page Builder
- # Post Types
- # Basic Usage
- # Components
- # Content Component Example
- # Thumbnail
- # Creating Components
- # Dynamic Thumbnails
- # Advanced Components - Pro
About Page Builder
By default, the Page Builder will be the default editor for WordPress pages. To the Page Builder it, add the following to your wp-config.php file.
define('TYPEROCKET_PAGE_BUILDER', false);
The page builder plugin helps developers and designers work together with clients to deliver the best experience when building modular/component-based designs.
Post Types
By default, the page builder will be applied to the page post type only. You can add more post types using the following filter:
add_filter('typerocket_ext_builder_post_types', function($post_types) {
    array_push($post_types, 'your_post_type_id');
    return $post_types;}
);
Basic Usage
For the most basic setup, duplicate your theme's current page.php template and rename it to standard.php. Now, in the page.php template file, use the page builder.
<?php get_header();

if( tr_show_page_builder("use_builder") ) {
    tr_components_field('builder');
} else {
    get_template_part('standard');
}

get_footer();
This code will use the old page template standard.php if the builder is not being used or the page is password protected.
Components
There are two directories you need to work with. The directories are: app/Components and wordpress/assets/components.
- The
app/Componentsdirectory is for adding the HTML for each component's front-end design and the admin. - The
wordpress/assets/components/builderdirectory is for the thumbnails of the components.
If you are using a plugin install you need to create these folders in your active theme by using overrides.
Also, you will need to register your components in the config/components.php registry and then apply them to an existing group like builder or make a new group. When using the Galaxy CLI to make components they will be registered for you but you will need to manually add then to a group.
Content Component Example
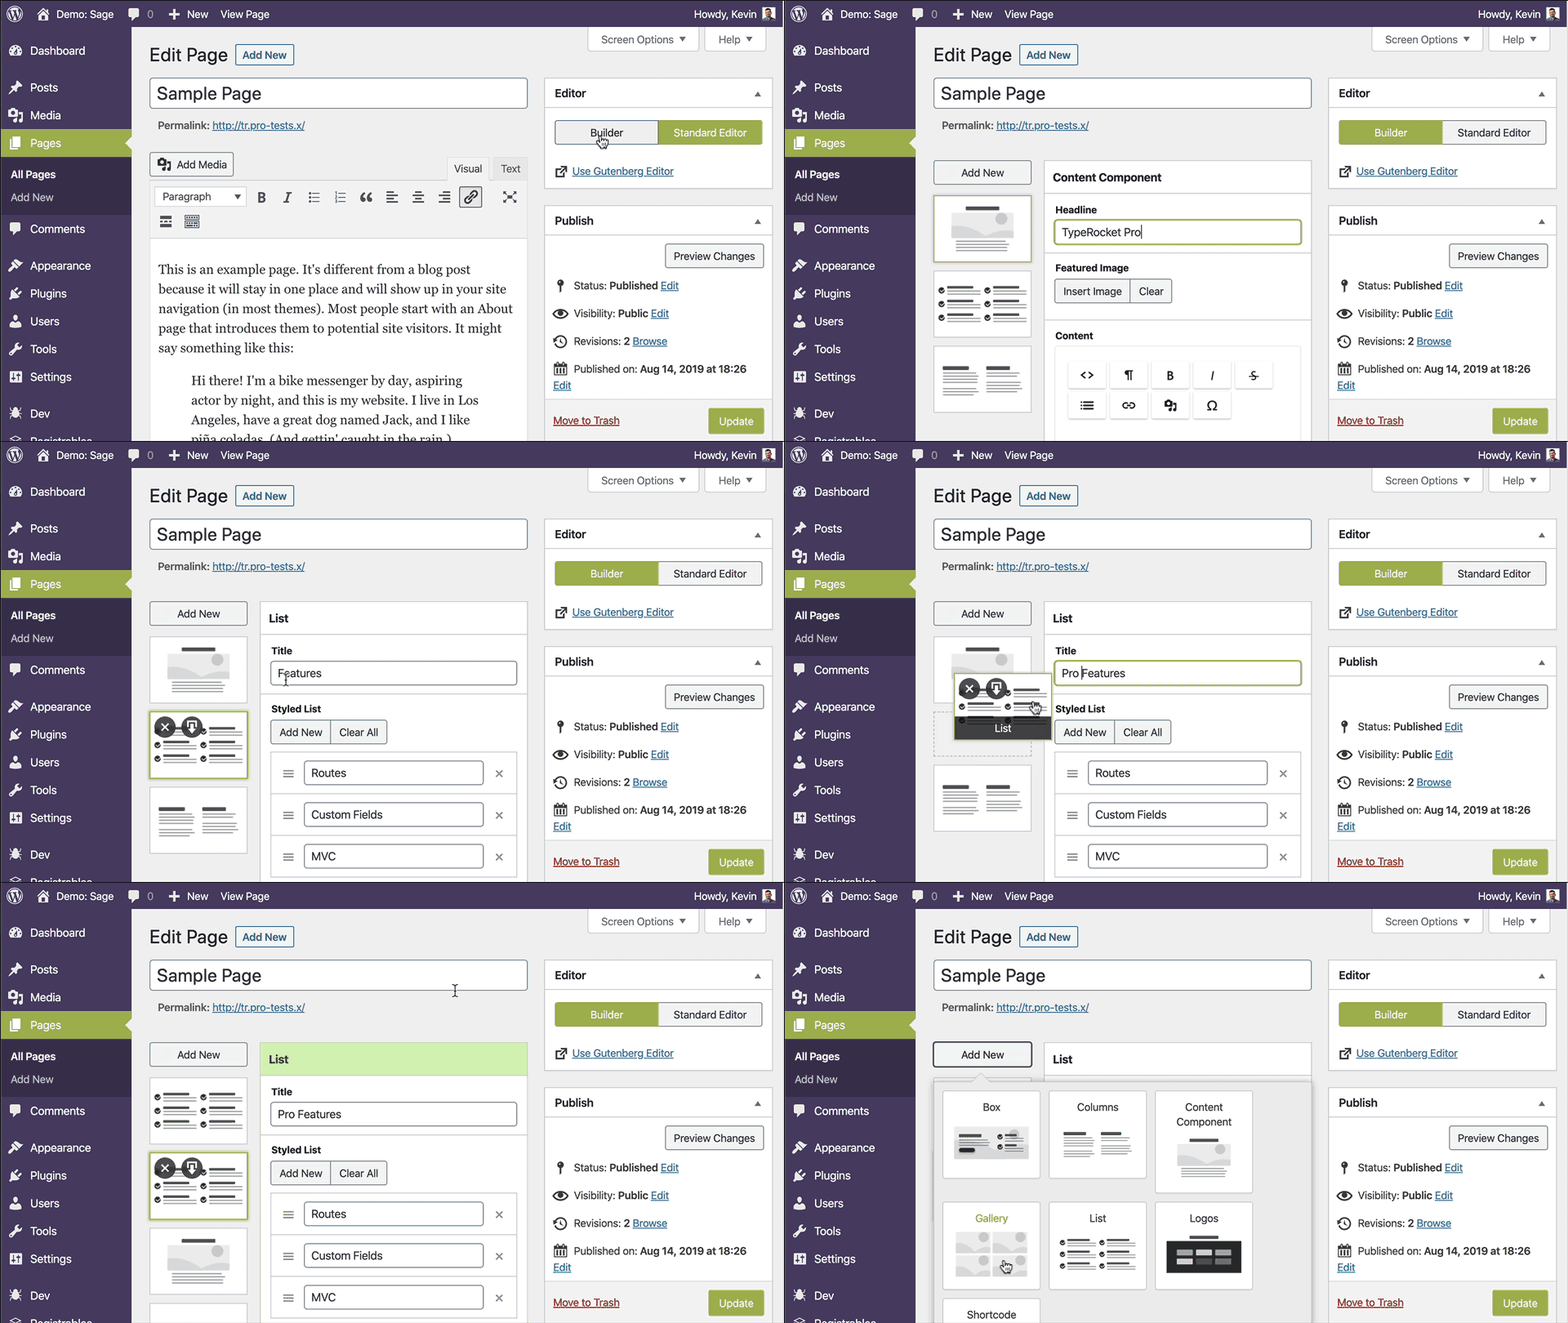
To get started, examine the app/Components/ContentComponent. This will give you a deeper look at what is going on and just how easy builder modular designs can be.
First, look at the component's backend contained with fields method. Here you can see three fields. One for a headline, image, and content. Then, take a look at the content components visual. Here you can see that the fields from the backend are accessible through the $data variable.
<?php
namespace App\Components;

use TypeRocket\Template\Component;

class ContentComponent extends Component
{
    protected $title = 'Content Component';

    /**
     * Admin Fields
     */
    public function fields()
    {
        $form = $this->form();

        echo $form->text('Headline');
        echo $form->image('Featured Image');
        echo $form->textarea('Content');
    }

    /**
     * Render
     *
     * @var array $data component fields
     * @var array $info name, item_id, model, first_item, last_item, component_id, hash
     */
    public function render(array $data, array $info)
    {
        ?>
        <div class="builder-content">
            <h2><?php echo esc_html($data['headline']); ?></h2>
            <?php echo wp_get_attachment_image($data['featured_image']); ?>
            <?php echo wpautop( $data['content'] ); ?>
        </div>
        <?php
    }
}
Thumbnail
To make the builder admin slide resemble the look of the component you, a thumbnail has been added at wordpress/assets/components/content.png. Thumbnails can be anything you like. In many cases, a screenshot of the design it implements is an easy way to go.
Creating Components
You can use the Galaxy CLI command make:component to create your component files quickly.
php galaxy make:component {key} {class} {title}
For example:
php galaxy make:component image ImageComponent "Image"
This command will:
- Create the component file
app/Components/ImageComponent. - Register the component to the
config/components.phpfile.
Next, you need to add your component to a group or make a new group.
<?php
return [
    /*
    |--------------------------------------------------------------------------
    | Component Registry
    |--------------------------------------------------------------------------
    */
    'registry' => [
        'content' => \App\Components\ContentComponent::class,
        'image' => \App\Components\ImageComponent::class, // new registered
    ],

    /*
    |--------------------------------------------------------------------------
    | Builder
    |--------------------------------------------------------------------------
    |
    | List of components you want included for the builder group.
    |
    */
    'builder' => [
        'content',
        'image', // manually add
    ],

    // maybe, manually add a group
    'new_group' => [
        'image',
    ]
];
Finally, a field can access a list of components using the group as their field name.
$form->builder('Builder');
$form->matrix('New Group');
Dynamic Thumbnails
You can dynamically set thumbnails using the thumbnail method. This is helpful if a field setting within your component changes the visual representation of the component.
/**
 * @param null|string $url
 *
 * @return $this|string
 */
public function thumbnail($url = null)
{
    if(func_num_args() == 0) {
        return $this->thumbnail ?? \TypeRocket\Core\Config::get('urls.components') . '/' . $this->registeredAs() . '.png';
    }

    $this->thumbnail = $url;

    return $this;
}
Advanced Components - Pro Only Feature
Advanced components can be cloned and named.
<?php
namespace App\Components;

use TypeRocket\Template\Component;
use TypeRocket\Pro\Template\AdvancedComponent;

class ContentComponent extends AdvancedComponent
{
   // ...
}
Found a typo? Something is wrong in this documentation? Fork and edit it!
