
In this tutorial, we will be making an example project that allows administrators to book flights for customers.
Before you begin, install TypeRocket and be sure to configure the Galaxy CLI. Thoughout this tutorial we will be using the TypeRocket starter theme.
Desired Features
Here is a list of the features we want to use:
- Database: ORM + Migrations
- Design Patterns: MVC
- Forms Custom Fields
- Security
- Dev Tools: Debugging + CLI
Here is what the client wants:
- Flights: Can't be a post type
- Seats: Will have many Flights
- JSON API: Needs to be public and paginate
- Admin: Needs to be restricted
Custom MVC Backends
First, create a database migration using the Galaxy CLI.
Database Migration
php galaxy make:migration add_flights_table
-- Description:
-- >>> Up >>>
-- >>> Down >>>
Next, Add the SQL needed to create the database tables.
-- Description: Flights Table
-- >>> Up >>>
CREATE TABLE `{Pro Only FeatureprefixPro Only Feature}flights` (
    `id` int(11) unsigned NOT NULL AUTO_INCREMENT,
    `customer_id` int(11) DEFAULT NULL,
    `seat_id` int(11) DEFAULT NULL,
    `notes` longtext,
    `meta` json DEFAULT NULL,
    PRIMARY KEY (`id`)
) ENGINE=InnoDB DEFAULT CHARSET=utf8mb4;
-- >>> Down >>>
DROP TABLE IF EXISTS `{Pro Only FeatureprefixPro Only Feature}flights`
Run the migration.
php galaxy migrate up
Model: Flight
Now, create a model with a controller for the database table. The -c will also generate the controller class for us.
php galaxy make:model -c base Flight
For example, with the model in place, you can access your database records using the TypeRocket ORM.
(new Flight)->find(1);
(new Flight)->where('seat_id', 1)->get();
(new Flight)->customer()->get();
Next, map the customer_id column to the WordPress users table using the App/User model using a model relationship.
class Flight extends Model
{
    protected $resource = 'flights';

    public function customer()
    {
        return $this->belongsTo(User::class, 'customer_id');
    }
}
Then, connect users to their flights.
class User extends WPUser
{
    public function flights()
    {
        return $this->hasMany(Flight::class, 'customer_id');
    }
}
Setting up these relationships opens the door to quickly querying models by relation.
(new Flight)->customer()->get();
(new User)->flights()->get();
Post Type: Seat
For the seat data, and mainly for example, use a custom post type.
In your theme's functions.php file add the following.
tr_post_type('Seat')
    ->setIcon('dashicons-tickets-alt')
    ->featureless()
    ->setAdminOnly()
    ->addColumn('Row', true)
    ->addColumn('Letter')
    ->setMainForm(function() {
        $form = tr_form();
        echo $form->select('Row')->searchable()->setOptions(range(1, 15), 'flat');
        echo $form->radio('Letter')->setOptions(['A','C','D','F'], 'flat');
    })->saveTitleAs(function (\App\Models\Seat $seat) {
        return $seat->meta->row.$seat->meta->letter;
    });
Model: Seat
Next, create a model for the post type.
php galaxy make:model -c post Seat
Setup the relationship with flights.
class Seat extends WPPost
{
    protected $postType = 'seat';

    public function flights()
    {
        return $this->hasMany(Flight::class, 'seat_id');
    }
}
class Flight extends Model
{
    // ...

    public function seat()
    {
        return $this->belongsTo(Seat::class, 'seat_id');
    }
}
Next, apply the model to the post type.
tr_post_type('Seat')
    ->setModelClass(/App/Models/Seat::class) // new line
    ->setIcon('dashicons-tickets-alt')
    ->featureless()
    ->setAdminOnly()
    ->addColumn('Row', true)
    ->addColumn('Letter')
    ->setMainForm(function() {
        $form = tr_form();
        echo $form->select('Row')->searchable()->setOptions(range(1, 15), 'flat');
        echo $form->radio('Letter')->setOptions(['A','C','D','F'], 'flat');
    })->saveTitleAs(function (\App\Models\Seat $seat) {
        return $seat->meta->row.$seat->meta->letter;
    });
Admin Pages: Flight
With the models in place, we can start making a UI that will enable end-users to interact with the database.
First, register a custom MVC backend resource admin UI pages. This will set up the pages needed for the controllers.
tr_resource_pages('Flight')->setIcon('dashicons-airplane');
Controller: Flight Index
To work with flights, we will need to edit the FlightController class under app/Controllers/FlightController.php. The controller will return an index veiw.
<?php
class FlightController extends Controller
{
    public function index()
    {
        return tr_view('flights.index');
    }
}
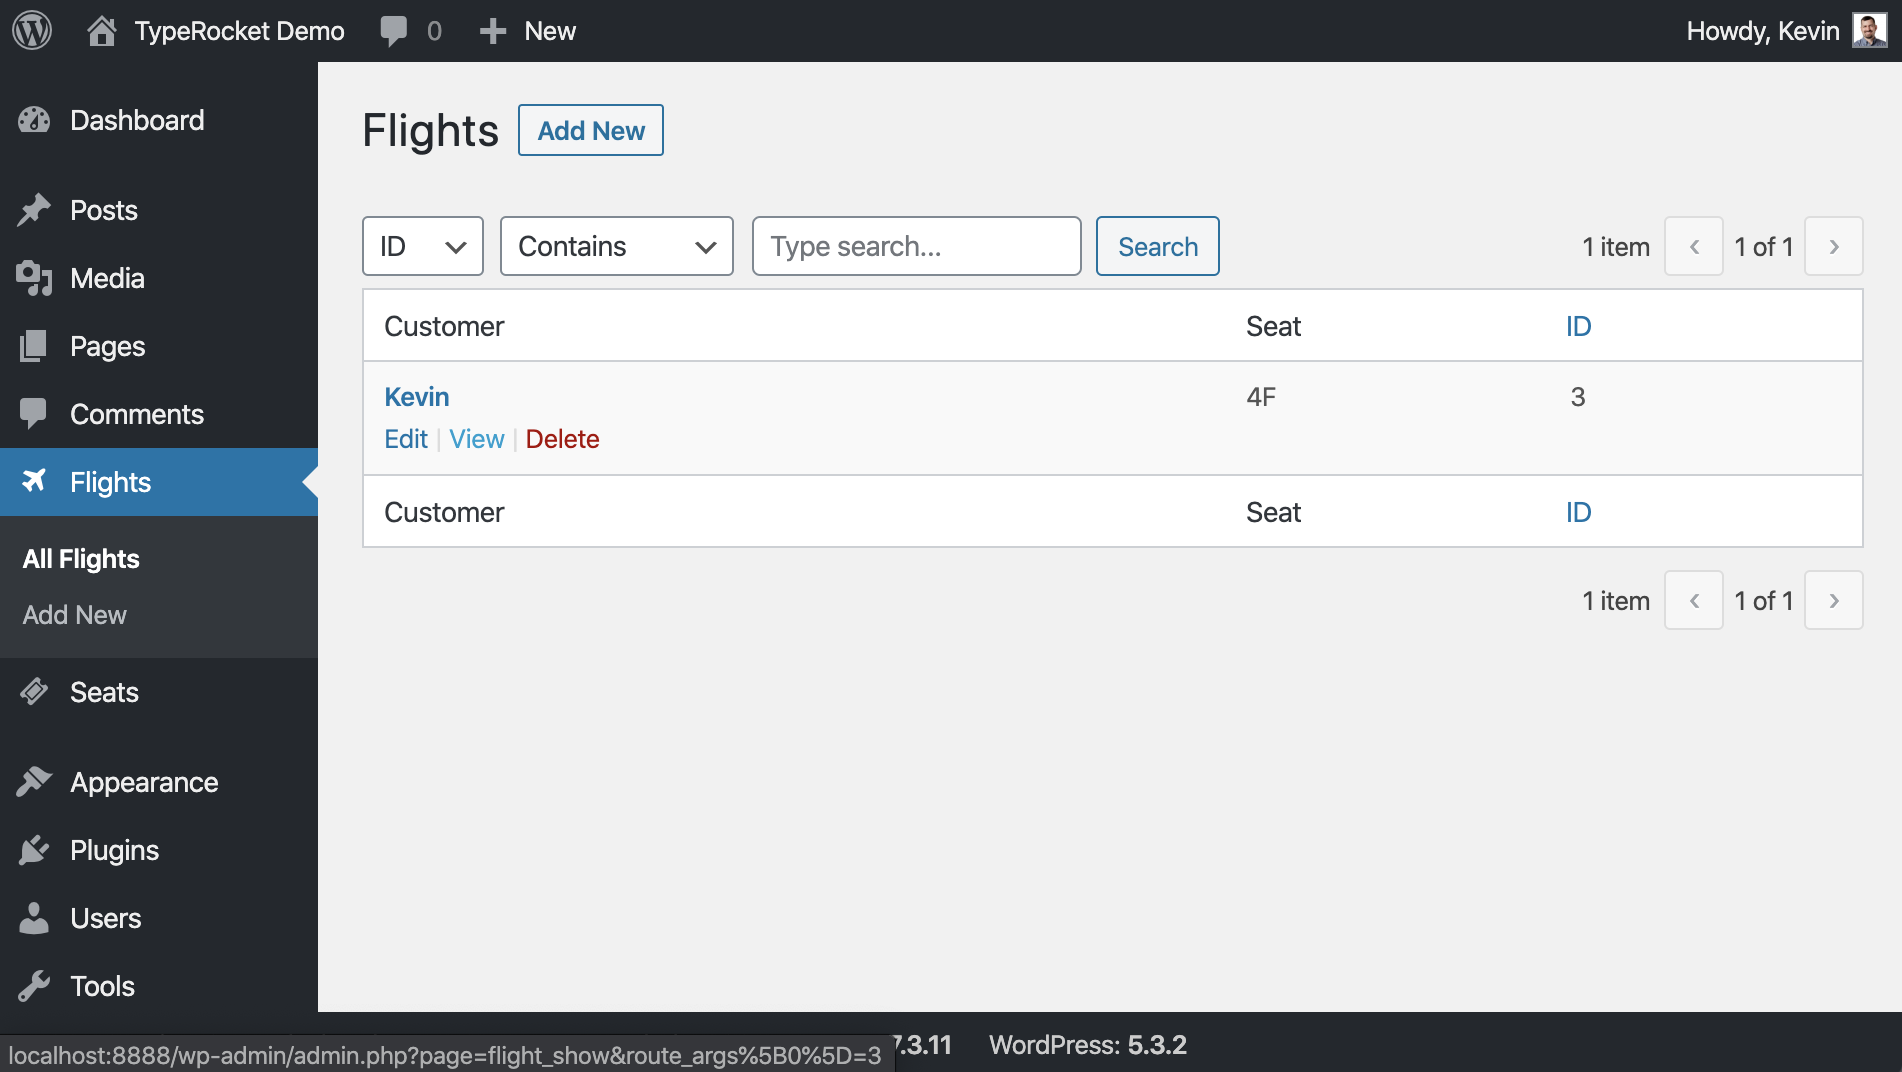
Views: Flight Index Page
For the index view the file resources/views/index.php.
<?php
$table = tr_table();
$table->setColumns([
    'customer.display_name' => [
        'label' => 'Customer',
        'actions' => ['edit', 'view', 'delete']
    ],
    'seat.post_title' => [
        'label' => 'Seat',
    ],
    'id' => [
        'sort' => true,
        'label' => 'ID'
    ]
], 'customer.display_name');
$table->render();
Views: Flight Add & Edit Pages

Next, create views for the add and edit pages alike.
public function add()
{
    $form = tr_form('flight');
    $button = 'Add';

    return tr_view('flights.form', compact('form', 'button'));
}

public function edit(Flight $flight)
{
    $form = tr_form($flight);
    $button = 'Update';

    return tr_view('flights.form', compact('form', 'button'));
}
The view file for these can be the same resources/views/form.php.
<?php
/** @var \App\Elements\Form $form */
echo $form->save($button)->setFields(

    $form->select('Seat')->setName('seat_id')
        ->setModelOptions(\App\Models\Seat::class),

    $form->select('Customer')->setName('customer_id')
        ->setModelOptions(\App\Models\User::class),

    $form->editor('Notes'),

    $form->repeater('Meta')->setFields(
        $form->row($form->text('Key'), $form->text('Value'))
    )->hideContract()

);
Model: Flight Record Formatting

When data is saved to the database via the view's form, you will want to format the data before it is saved. You can do this with the $format property. When the data is fetched from the database, you will want to $cast the data to a format that suits your needs.
In the flight example, format the data to JSON before saving and then cast it to an object when pulling it back out.
class Flight extends Model
{
    // ...

    protected $format = [
        'meta' => 'json_encode'
    ];

    protected $cast = [
        'meta' => 'object'
    ];
}
Model: Flight Security
Next, declare the fields that are safe to save using the ORM with the $fillable property.
class Flight extends Model
{
    // ...

    protected $fillable = [
        'seat_id',
        'customer_id',
        'notes',
        'meta',
    ];

}
In the admin UI, with debug mode on, you will see the fillable icon next to each field.

Controller: Flight Create & Update
With the views and models in place, its safe to start saving data to the database via the controller.
public function create(Request $request)
{
    $flight = new Flight;
    $flight->save($request->fields());

    return tr_redirect()
        ->toPage('flight', 'index')
        ->withFlash('Flight created!');
}

public function update(Flight $flight, Request $request)
{
    $flight->save($request->fields());

    return tr_redirect()
        ->toPage('flight', 'edit', $flight->getID())
        ->withFlash('Flight updated!');
}
Controller: Flight Destroy
Next, add the destroy method for the controller. And make sure the current user is allowed to perform the action.
public function destroy(Flight $flight, Response $response)
{
    if(!$flight->can('delete')) {
        $response->unauthorized('Unauthorized: Flight not deleted')->abort();
    }

    $flight->delete();

    return $response->warning('Flight deleted!');
}
Policies
Policies give you control over how the line $flight->can('delete') works. Create a policy using the Galaxy CLI.
php galaxy make:policy FlightPolicy
Next, define who can delete a record by restricting access to only users with the capability manage_flights.
class FlightPolicy extends Policy
{
    public function delete(AuthUser $auth, $object)
    {
        if( $auth->isCapable('manage_flights') ) {
            return true;
        }

        return false;
    }
}
Role: Custom
WordPress does not yet know the users that can manage_flights. Add access to this capability to all administrator users.
To add capabilities, WordPress likes to add them via plugins. You should also take this approach. You can name the plugin file anything you like.
<?php
/*
Plugin Name: Flight TypeRocket Roles
Version:  1.0
Description:  For managing roles.
Author:  TypeRocket
License: GPLv2 or later
*/

register_activation_hook( __FILE__, function() {
		add_action('typerocket_loaded', function() {
				tr_roles()->updateRolesCapabilities('administrator', ['manage_flights']);
		});
});
Now, activate your plugin.
Auth Service
Next, you need to register your new FlightPolicy to the auth service.
class AuthService extends Authorizer
{
    protected $policies = [
        // Models
        '\App\Models\Flight' => '\App\Auth\FlightPolicy',
        '\App\Models\Post' => '\App\Auth\PostPolicy',
        '\App\Models\Page' => '\App\Auth\PagePolicy',
        // ...
    ];
}
Now, go back to the admin and try deleting a flight with an admin. Your users should be authorized for the following action.
if(!$flight->can('delete')) {
    $response->unauthorized('Unauthorized: Flight not deleted')->abort();
}
JSON API
If you wanted to make a JSON API for the custom data you can do it using TypeRocket routes by adding one to the routes/public.php.
tr_route()->get()->on('flights/customer/*', function(User $user) {
    return $user->flights()->paginate(2);
});
Now, when you visit the URL https://example.com/'flights/customer/1 you will see your JSON API, as long as you have the record.
{
  "items": [
    {
      "id": "1",
      "customer_id": "1",
      "seat_id": "9",
      "notes": null,
      "meta": {
        "15835551205210": {
          "key": "kevin",
          "value": "dees"
        }
      }
    }
  ],
  "current": "2",
  "pages": 2,
  "count": "3",
  "links": {
    "current": null,
    "next": null,
    "previous": "http://localhost:8888/flights/customer/1/?paged=1",
    "first": "http://localhost:8888/flights/customer/1/?paged=1",
    "last": "http://localhost:8888/flights/customer/1/?paged=2"
  }
}
Next Steps
Next, lets look at saving our custom post type fields to a custom table instead of post meta.